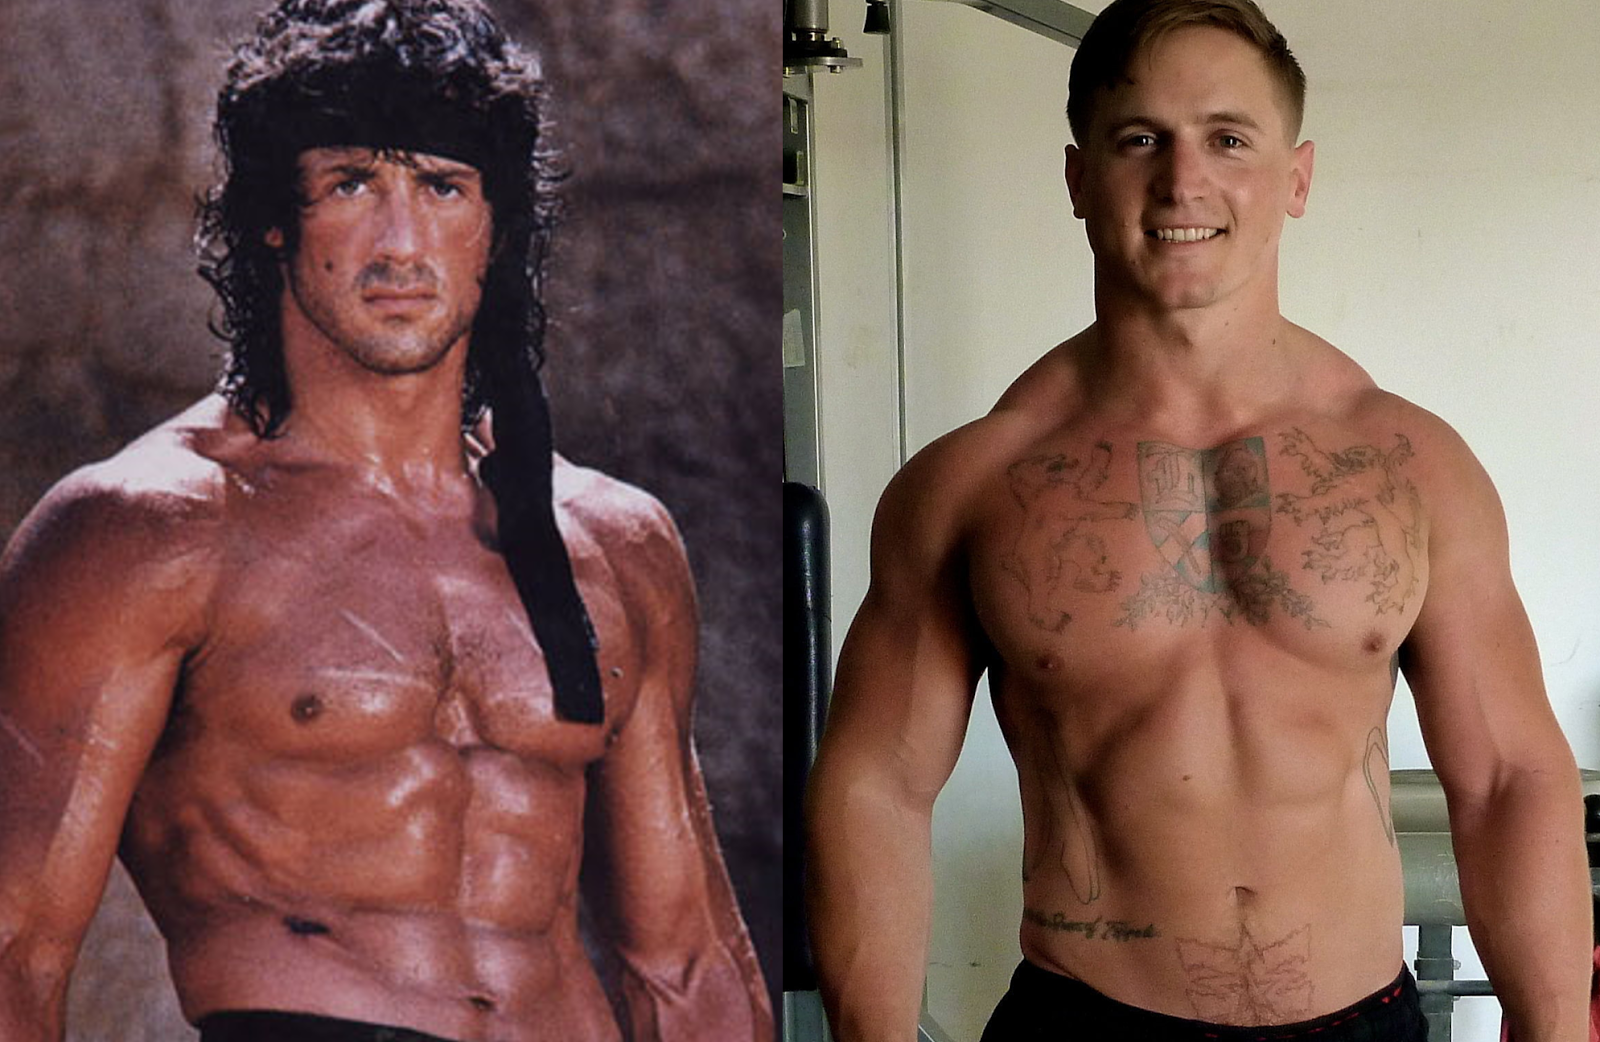
The first thing you need to know is Stallone invented
Jacked & Tan back in the 'Stan during Rambo III.
All I did back then was my best impersonation.
All I did back then was my best impersonation.
Write Up: About 6k words at the reading level of a Marine, so...
Program
Length: 12 Weeks
That and all this info is as always, free!
Donate what you like.
PayPal address to the right.
Thank you.
Structure:
Linear block periodization (mostly)
Weekly
Schedule: 4x Weekly training sessions. An upper/lower split with T2 and T3
back work done on either type of day, up to lifter preference. A fifth day is
optional.
Description and Comparison to Jacked & Tan 1.0: The
program will have you progress through two six week blocks each ending with a
1RM attempt. The means of progression though these two blocks is simple linear
progression for both the T1 and first T2 movements. Follow on T2 and T3
movements are performed as Max Rep Sets (MRS), which allows for effort to be
pushed and sustained after the work requiring the most focus, energy, and
effort is done beforehand.
Beyond a block periodized approach and a linear progress
though the T1 and T2a movements the similarities are few. Exercise selection is
the GZCL norm for the associated tier, so that’s the same. Somewhat similar
would be the additional T2 and all T3 movements that use a Max Rep Set (MRS)
approach, which are like the myo-reps that were used in the original program,
but simpler to use and progress. It is however different enough that it will be
described in detail later in the write up.
Additionally, you will never reach beyond a T1 or T2 10 Rep
Max (RM), unless it is for a drop set rep out, in that case it would be a
decision you would make during the session.
But perhaps best of all is you are never going to be further than three
weeks away from hitting a heavy 5RM or less. This is because the first J&T was
a truer approach to block periodized training (working down from high reps to
low and up from low intensity to high.) This is essentially a “condensed”
version where the progression week to week is faster and because of this it
resets halfway through where you then get another run at the heavies in the T1.
For this reason, program length and progression speed, advanced lifters may not
benefit as much as newer lifters, mostly in regards to max strength improvement
(especially so that first six weeks.)
So why the hell
should you try to get Jacked & Tan?
First and foremost, if you’re like me it is a fun break from
usual powerlifting training. This means all the common programs like Smolov,
Shieko, anything starting with an S, those that sound vaguely Russian, or using
reduced range of motion, high lift frequency, low workout volume, always heavy,
bands, chains, or any other of the hundreds of “specialized” programs for
strength training that might actually be a ruse to get you to buy discreet
bondage gear.
Looking at you EliteFTS powerlifting-accessories page…
Looking at you EliteFTS powerlifting-accessories page…

Is EliteFTS a gym or a sex dungeon?
As long as it's 2/3rds chains and latex bands we'll never know.
For those who are familiar with the original Jacked &
Tan program it was not without its faults. The tan guidance portion was
severely lacking and the program itself was a tad too long and kind of
intimidating to those lifters who needed it most- intermediates. I feel the
latter portion has been resolved with this updated version and intermediates
everywhere will push aside (at least temporarily!) their specialized programs
and seek to become ridiculously jacked and allegedly tan.
Unfortunately I’ve yet to get that little piece figured out, sorry :\
With all this talk of intermediates utilizing this program I
think it should be stated that this is not specifically intended for any type
or caliber of lifter. I am confident that all lifters from novice to elite
could benefit from this kind of training because at the very least it is a fun
and challenging break from the norm. It is from my experience however that the
intermediate powerlifter needs exposure to variety, volume, and frequent hard
effort more than any other type of lifter.
The truth is this program isn’t really an updated version of
that now 2-year-old program. Instead it is a completely new one, loosely
modeled after similar concepts while also utilizing some GZCL protocols. J&T2.0
is a means to achieve the original goals of placing a big focus on hypertrophy
and work capacity over peak strength development. While that will certainly go
up it is not the stated goal of the
program. If it were then it would be better built for accomplishing that
task. So your 1RM may improve but what we are really looking for here is a
transformation from gym rat to freak beast.
I have built and will train with Jacked & Tan 2.0 to
commemorate the two-year anniversary of the original program because it helped
solidify my understanding of my own training, improved my understanding of
training others, and dramatically improved my strength and size. You’re also
receiving this because like always, if I’m going to get big and strong I’ll try
my best to make sure I bring along as many of you as possible! Huge thanks to
all of you for making my goal a reality- to make the world a stronger place.
Even greater thanks is due for your views, reads, subs, comments, and donations! The least I
could do is continue providing quality free content that
isn’t quite guaranteed to get you bigger and stronger but is damn near so. I
hope you enjoy the following write up and find it helpful to your understanding
and executing a massively successful run through Jacked & Tan 2.0. Also be
sure to check out the updated compendium full of free programs and associated challenges.
I’mma let you finish,
but… a rant on training and programming
There is nothing special required for getting stronger, just strong
effort.
It is important to understand the truth about training. We
know an awful lot about the minutia but most experts will agree, when it comes
to getting more jacked and extra strong there are hundreds of ways to open that
protein tub. Sure there are best practices that myself and many others write
about, but what happens in the real world is typically a bit different. People
miss workouts, go harder longer than they should or might not even know how to
gauge effort at all! And at the end of the day they’re only eating hotdogs and
pizza anyways.
If the data could be realistically collected and analyzed my
hypotheses is that it would more likely defend the argument of “everything
works if you try hard enough” rather than “these specific things work 100% of
the time.”

You need exactly seven more reps to
accidentally Ronnie Coleman.
Effective training requires a few things:
1.
A general direction with a progressive and flexible
plan.
a.
This means you know where you’re headed, the
route, and means (more or less.)
A few mistakes here or there can be mitigated by:
2.
Good training habits!
a.
Like knowing when to push harder or go easy (regulating effort),
monitoring rest, in-session fatigue, and recovery.
i.
These are learned by experience as each session
is an opportunity for refinement of the process and personalization to the
program.
ii.
Exposure to good coaches, training partners, and materials.
But none of those actually matter without…
3.
Hard effort and honest training decisions!!!
a.
Do you really believe you can make that 4RM? Or
might it accidentally end up being a 1RM or 2RM because you’ve been after that
weight for a while and you’re more impatient than strong at the moment,
unfortunately. Are you taking the T2 easy because your elbow actually hurts or
are you just not feeling it?
Be honest with yourself and your abilities and you’ll improve faster
than you think.
Lastly this is simply a training program, not a holy
grail and definitely not the only way to get jacked or tan. Hell this literally might be the worst place for
tanning advice, because there is none. As you progress through J&T2.0 be
sure to make it yours! This means
customization to the exercise selection, pushing a rep out extra hard when you
can, and choosing to skip some movements here or there because you truly are
run down.

I still got one more!
(no you don't.)
T1 Structure & Progression
Movement options: These should either be competition
lifts like the squat, bench press, or deadlift. Or they can be any type of
multi-joint movement that can be loaded heavily with a high degree of relative
safety (so weird shit you’re out) and ideally utilizes a barbell, but not
required to do so.
Confused yet? Yeah me too.
Confused yet? Yeah me too.
It makes more sense when put like this:
Upper body lifts: Bench
Press and OHP with other good options being Sling Shot bench, close grip,
incline bench, push press, and jerk.
Lower body lifts: Squat and
deadlift but also including the front squat, stiff legged or opposite stance
deadlifts, and deficit deadlifts. (Sorry weightlifters the snatch and clean
aren’t really suited for these kind of rep schemes.)
Seriously Important!!!
Workouts listed as Weight
x Reps x Sets and
+ means the last set has an optional AMRAP,
+ means the last set has an optional AMRAP,
(As Many Reps As Possible aka Rep Out.)
Keep in mind that when
performing max rep work
always keep 1-2 reps left in your tank. (regardless of the tier)
Weekly structure: Alternating lower/upper or vice
versa.
Day 1: Squat or deadlift
variety
Day 2: Bench or overhead
press variety
Day 3: Deadlift or squat
variety (Must be different than Day 1.)
Day 4: Overhead press or
bench variety (Must be different than Day 2.)
Day 5: [OPTION, Not Programmed]
Choose a movement type that needs more special
attention. This can be for improving the capability of the lift itself or for
the benefits of performing that lift, like getting a bigger back because your 5th
day is built around an uncommon but completely fine T1 row movement. Had I time
enough to train 5x a week my J&T2.0 would have a Day 5 Sling Shot bench T1.
Note:
Yes, you can swap the days around to where you can bench on day one.
T1: Block 1 - Weeks 1
through 6
Every training session you work up to a Rep Max (RM) then
reduce the weight to a percentage based off a Training Max (TM) for additional
T1 drop sets. An optional rep out is attached to the last drop set and can be
used as a means to gauge progress and determine whether or not the intensity of
the drop sets matches the desired outcome. These last set rep outs are the
primary means of pushing effort when there’s gas in the tank to do so.
Prioritize them in the T1.
Mesocycle A: Weeks one through three are the portion
of the program that calls for the highest rep maxes performed in the T1. These
first three weeks are the highest volume across all tiers and will be the most
brutal for lifters not accustomed to this style of training. (Good news is
after three weeks you’ll be loving it.)
Week 1: Work up to a 10RM
then perform 70% of (TM) x 6 reps x 3+ sets
Week 2: Work up to an 8RM then perform 75% of (TM) x 5 reps x 3+ sets
Week 3: Work up to a 6RM then perform 80% of (TM) x 4 reps x 3+ sets
Week 2: Work up to an 8RM then perform 75% of (TM) x 5 reps x 3+ sets
Week 3: Work up to a 6RM then perform 80% of (TM) x 4 reps x 3+ sets
Mesocycle B: Weeks four through six continue with RM
attempts and follow-on T1 drop sets. However, the major difference is the T1
drop sets now progress with smaller weekly percentage increases. For most
lifters this means going from 5% to 2.5% week-to-week, but for those with
temporarily weaker lifts slightly larger percentages might be needed to reflect
real-world allowable jumps (without needing ridiculous micro-loading, I’ll
avoid the rant until later.)
Week 4: Work up to a 4RM then perform 82.5% of (TM) x 3 reps x 3+ sets
Week 5: Work up to an 2RM then perform 85% of (TM) x 2 reps x 4+ sets
Week 6: Work up to a 1RM that you can confidently double if you wanted.
This Week 6 1RM should be within 5% of your actual max, if not already a new 1RM. There are no additional T1 drop sets following this attempt.
AMRAP
Expectations: It is hard to say what you should expect on your last set rep
outs. There are a lot of factors at play with this, like how hard you pushed
the RM attempt beforehand, your work capacity at T1 intensities, and recovery
habits. But as a frame of reference myself and my lifters running the 2.0 beta versions are seeing a typical +3 to
+5 on the last set rep-outs of our T1 drop sets in the first three weeks. I
would say that for Mesocycle A if that last set is greater than 12 reps than
the weight is definitely too light and Mesocycle B should be adjusted. On the
flip side of the coin if no additional reps are earned for more than three
weeks in a row then it is suggested that a lighter intensity be used for the future
T1 drop sets. Extended effort is a fundamental part of the program so while
last set rep outs are optional it is suggested you do them as much as possible
with these T1 drop sets in particular.

"So as many as possible, but not?"
T1: Block 2 - Weeks 7
through 12
Much like the first block the second continues with daily RM
testing. The biggest difference is that
Block 2 itself is split in two mesocycles each working through three
weeks of low-end rep maxes. This means the second half of Jacked & Tan 2.0
is significantly heavier than the
first. Additionally, the T1 drop sets are no longer programmed off a training
max, instead they are based on a percentage of the weight that was hit for the
day’s RM attempt. This means that an increasingly outdated training max is no
longer used and thus the T1 drop sets more accurately reflect the abilities of
the lifter on that day, resulting in the effort tending to be higher in the T1
(before even considering rep outs.)
Mesocycle C: Here is an opportunity to beat recent
personal records for 6, 4, and 2RM’s from Block 1. This third mesocycle’s T1
drop sets are based at 85% of the day’s Rep Max (RM) attempt done for half the
reps per set. Meaning this is seriously heavy and demanding work.
Week 7: Work up to a 6RM
then perform 85% of the RM x 3 reps x 5+ sets
Week 8: Work up to an 4RM then perform 85% of the RM x 2 reps x 5+ sets
Week 9: Work up to a 2RM then perform 85% of the the RM x 1 reps x 5+ sets
Week 8: Work up to an 4RM then perform 85% of the RM x 2 reps x 5+ sets
Week 9: Work up to a 2RM then perform 85% of the the RM x 1 reps x 5+ sets
Mesocycle D: Very similar to the prior mesocycle this
one culminates with finding new 5, 3, and 1RM’s. These are standard rep maxes
utilized for most training programs and are the most commonly used when
determining ability. (Really great for transitioning into one of those fancy
specialized programs!) The drop sets here though are now pushed up to 90% which
means that this fourth and final mesocycle is damn heavy and significantly heavier than the three that preceded
it. But fortunately for you there was nine weeks of serious preparation leading
up to it so this will be difficult, but not impossible.
Week 10: Work up to a 5RM then perform 90% of the (RM) x 2 reps x 3+ sets
Week 11: Work up to an 3RM then perform 90% of the (RM) x 1 reps x 3+ sets
Week 12: Work up to a 1RM then rest ‘cause you earned that shit homie.
AMRAP Expectations: Since Block 2’s T1 drop sets are
based off the rep max of that day versus an old training max it is harder to
say. This second block is overall heavier and as a result fatigue will be
higher, expect to see only +1 to +3 on these drop sets for Mesocycle C and +1
to +2 on Mesocycle D (if any at all, as they will be soul crushingly difficult.)
If the drop sets yield greater than +5 on the last set rep outs for weeks seven
and eight, then it is suggested that intensity be increased moderately for the
remainder of the block. Then pat yourself on the back because apparently your
work capacity at intensity is stellar.


The Illuminatty = Gains Train?
Maybe.
Before we get to T2 & T3 specifics...
T2 & T3 Max Rep Sets (MRS) Guidance
These
are
very simple to understand and very effective in use, especially so in
the
T2 and T3. And much like the Myo-Reps used in the original program they
bring the pump to life. Better than before though these are easy to
understand and progress.
Step One: With the appropriate
movement identify which RM is called for that day.
Block One Rep Maxes
Weeks: 1/2/3/4/5/6
T2a/b: 15/12/10/8/6/Rest
T3: 20/18/16/14/12/10
Block Two Rep Maxes
Weeks: 7/8/9/10/11/12
T2a/b: 12/10/8/6/Rest/Rest
T3: Rest/18/16/14/12/Rest
Step Two: Perform three additional
max rep sets with that weight, be sure to leave 1-2 reps in the tank on each
MRS.
Step three: feel the pump and enjoy
being jacked. MRS is that easy.
Example: Wide Grip Lat Pull Down x “?” weight x 20 Reps + 3MRS
This means you would work up in a few sets to the heaviest
20 reps you could manage with the wide grip lat pull down, rest 30 to 60
seconds, then perform another set for max reps with that same weight. In total
four sets will be done with the same weight. The first is identifying the RM
desired, the following three are your MRS. Rest 30 to 60 seconds between all sets.
Rep drops across each MRS are very personal and subjected to
a variety of factors, primarily work capacity and how damn hard you killed it
in the T1 and T2. As a frame of reference when performing bodyweight pull ups
for 4MRS I typically manage 12/6/4/4 (or in thereabouts range) and for lat
pull downs it is much closer from set to set, so maybe 12/10/10/8. Rep drops
are normal and expected. Only push as hard as you can recover from.
T2 Structure & Progression
This is where some of you may get mixed up. There can be two
to three T2 movements (T2a, T2b, T2c.) The first one (T2a) will always be
programmed off of a training max across the 12 weeks. In Week-7 it will be
calculated off the 1RM that was found the week prior; so be sure to update your
spreadsheet! The T2a is where you gain additional volume in movement variations
that should be close to your competition or T1 lifts. For this reason it is
best that most lifters start their T2a with a normalized training style, like
using percentages, reps, and sets because it makes tracking progress and
planning it much, much easier, as linear progression is very straight forward.
Not like this newfangled
bullshit…
Additional T2 movements (T2b & T2c) are not
programmed off of a training max! Instead like the T3 they use a Max Rep Set
(MRS) progression. This is a means to introduce lifters to utilizing this effort-driving
concept for heavier compound movements.
By the time you get to the T2b & T2c movements the
fatigue is so real that finding a first set RM is going to be extremely offset
from your fresh abilities. Perhaps it calls for finding a 12RM and following
that with 3 additional Max Rep Sets (MRS) of the same weight… that 12RM won’t
be anything close to what you could do normally with that movement and those
additional MRS will drop in reps as they
carry on. This is expected and serves as a means of auto-regulation.
Only push your MRS as hard as you can recover from. So if you’re feeling good
leave just 1-2 reps in the tank. If you’re feeling run down that would be
leaving even more in the tank on MRS.
And always be mindful of your recovery day-to-day and week-to-week.
A learning curve is expected here so dedicate the first 2-3
weeks for dialing in your effort and recovery. It is best to take it a bit easy
at first then to go full savage, kill your arms with curls, then walk around
like a coat rack for the next three days.
Remember, making progress is about consistently and sustainably producing effort. So long as you’re doing that the MRS concept
works in all tiers. It just so happens that it is quite difficult to maintain
sustainability in the T1. But the skill and usefulness of MRS can be developed
in the T3 and honed in the T2. By then fearlessly driven lifters can attempt
MRS in the T1.
Failure to stay away
from actual failure during a movement
will result in failure at the end of the program.
Movement options: These can include all the movements
from the T1, including machine and cable multi-joint movements. (Meaning these
should also be compound lifts!) And although dumbbells weren’t explicitly
allowed in the T1 they definitely are in the T2. The T2 movement for the
workout should not be the same one as the T1. Closest they should be is one
variety followed by another. For example, T1 front squat followed by T2 back
squats, or bench with OHP.
I tend to keep it fairly vanilla here:
Lower body movements: Squat or
deadlift varieties of front, high bar, hack squat machine, and single leg work
like lunges and leg press.
Upper body pressing movements: Bench,
OHP, close grip bench, Spoto bench, incline, and legs up bench. However
dumbbell varieties and dips are completely legitimate options.
Additionally, back work is considered mostly a T2. This means all
types of rows, pull ups, and lat pull downs. Cables, machines, barbells are all
available. (T1 option exists for barbell or kroc rows.) I recommend back work
be either plugged into lower body or upper body workouts, whichever you prefer.
I enjoy the struggle of doing back after squats and deadlifts personally…
Weekly structure: Be sure your T1 and T2 do not
match! If your T1 is a squat choose a DL, front squat, safety squat bar, or
machine-type leg movement. Exposure to lift variety is a requirement of the
program. A “Boring But Big” model will likely be too taxing as familiar lifts
tend to be heavier lifts and heavier means more recovery debt!
Example
T2 movements in a workout:
T1: Back Squat
T2a: Stiff Leg Deadlift
T2b: Single Leg Press
T2c: Chest Supported Row (Two are
standard three are optional in the T2.)
One more time for good measure: All workouts as Weight x Reps x Sets
T2: Block One - Weeks
1 through 6
Mesocycle A
– Weeks 1 though 3
Week 1
T2a: 50% x 10 reps x 4 sets
T2b: Find 15RM then do 3 more Max Rep Sets (MRS) at the same weight.
T2c:
Find 15RM then do 3 more Max Rep Sets (MRS) at the same weight.
Week 2
T2a: 60% x 8 reps x 4 sets
T2b: Find 12RM then do 3 more Max Rep Sets (MRS) at the same weight.
T2c:
Find 12RM then do 3 more Max Rep Sets (MRS) at the same weight.
Week 3
T2a: 70% x 6 reps x 4 sets
T2b: Find 10RM then do 3 more Max Rep Sets (MRS) at the same weight.
T2c:
Find 10RM then do 3 more Max Rep Sets (MRS) at the same weight.
After week three the T2a intensity progression cuts in half.
A thing to remember here is that some movements may be able to sustain 10%
increases week to week while others can only do 5%. This is normal and is a
function of work capacity, skill, and fatigue levels. So while your lower body
lifts may progress these first three weeks by 10% weekly your upper body lifts
might only go up by 5% week-to-week. This is fine and is in fact the situation
I find myself in.
The key is to adjust your T2a progression to fit reasonable
expectations of performance that can be estimated off of recent training
performances. The final set of the T2a movements should always be able to be
completed. If failure to achieve that volume occurs then reduce the intensity
of that specific movement.
Mesocycle B
– Weeks 4 though 6
Week 4
T2a: 75% x 4 reps x 5 sets (Note that it’s just 5% higher than the week prior.)
T2b: Find 8RM then do 3 more Max Rep Sets (MRS) at the same weight.
T2c:
Find 8RM then do 3 more Max Rep Sets (MRS) at the same weight.
Week 5
T2a: 80% x 2 reps x 7 sets
T2b: Find 6RM then do 3 more Max Rep Sets (MRS) at the same weight.
T2c:
Find 6RM then do 3 more Max Rep Sets (MRS) at the same weight.
Week 6
No T2! You’ve earned a rest.
T2: Block Two Weeks 7
through 12
In this 2nd Block the T2 progresses much like the
means of the first six weeks. The difference here is a heavier trend and likely
fewer reps in the MRS due to higher fatigue levels from the more demanding T1
and T2 work of the second half of Jacked & Tan 2.0. The weekly progression continues with the amount from Mesocycle B (So likely 5% or 2.5%).
Mesocycle C
– Weeks 7 though 9
Week 7
T2a: 70% x 6 reps x 5 sets
T2b: Find 15RM then do 3 more Max Rep Sets (MRS) at the same weight.
T2c:
Find 15RM then do 3 more Max Rep Sets (MRS) at the same weight.
Week 8
T2a: 75% x 5 reps x 5 sets
T2b: Find 12RM then do 3 more Max Rep Sets (MRS) at the same weight.
T2c:
Find 12RM then do 3 more Max Rep Sets (MRS) at the same weight.
Week 9
T2a: 80% x 4 reps x 5 sets
T2b: Find 10RM then do 3 more Max Rep Sets (MRS) at the same weight.
T2c:
Find 10RM then do 3 more Max Rep Sets (MRS) at the same weight.
Like Block 1 there’s a split between the progression of the
T2 across the mesocycles C & D. Here the progression will cut in half
again. For most this will mean a reduction of 5% to 2.5%. Other decreases are allowed, so long as
performance in the T1 is not hindered as a result.
Mesocycle D
– Weeks 10 though 12
Week 10
T2a: 82.5% x 3 reps x 6 sets (Note it’s just 2.5% higher than the week prior.)
T2b: Find 6RM then do 3 more Max Rep Sets (MRS) at the same weight.
T2c:
Find 6RM then do 3 more Max Rep Sets (MRS) at the same weight.
Week 11
T2a: 85% x 2 reps x 7 sets
T2b & T2c: Rest
Week 12
You just hit a lifetime
best so crack open a beer or eleven and celebrate.


Me celebrating the Jackedening.
T3 Structure & Progression
Movement options: This one can be quite broad. The T3 is
where your bodybuilding, rehabilitative, and rehabilitative movements play.
This means that damn near everything under the sun is an option, which is great
because that increases personalization of the program that in turn bumps up the
fun meter.
My top T3 pics by body part: (By no means an exhaustive list of options...)
Pecs: Flyes, Push
Ups, DB spoon press.
Shoulders: Lateral
raises, single arm overhead DB or KB press, rear delt flyes,
front plate raise and behind the neck press.
front plate raise and behind the neck press.
Triceps: Cable
triceps push downs and overhead extensions. Body weight dips,
diamond pushups, and skull crushers.
diamond pushups, and skull crushers.
Biceps: Ez bar curl,
DB hammer curl, Incline DB curl, Machine preacher curl,
and cable rope curl.
and cable rope curl.
Back: Body weight pull ups, v-grip lat
pull down, rope lat pull down, wide grip lat pull down, v-grip cable row,
chest supported row, and hyper extensions.
Abs: Planks, ab wheels, and Pallof
presses. Hanging knee raise and leg raises.
Quads: Leg extension (seated and laying),
sissy squats, and box step ups.
Hamstrings: Leg curls (all types), GHR,
lunges, and RDL.
Glutes/Hips general: Lunges,
abduction/adduction machine, hip thrust,
and kick back machine.
and kick back machine.
Calves: I don’t do calves but I
heard from Arnold donkey calve raises are good.
#TeamCalves
Weekly structure: There should be a minimum of three
to four movements in the T3. These are structured in a way to be accessories to
the T1 and T2a movements. As stated previously, additional back work is a T2
for the most part and I prefer to put it on my squat or deadlift T1 days. You
can instead opt to place it on your bench days.
Example
T3 movements in a workout:
T1: Back Squat
T2a: Stiff Leg Deadlift
T2b: Single Leg Press
T2c: Chest Supported Row
T3a: V Grip Cable Row
T3b: Leg Curl
T3c: Leg Extension
T3d: Dumbbell Hammer Curl (3-4 are standard optional 4-5 in the T3.)
T3: All Blocks Weeks
1 - 12
Like the tiers that came before it this one progresses linearly
by reducing in rep values each week and ideally
(but not required to do so)
increasing in weight, at least modestly. These are performed by finding a rep
max with that movement then using that weight and performing the additional max
rep sets (MRS). This is a great means of autoregulation as it inherently
requires you to do the work within your means. Push close to failure, but don’t
reach it. If you’re new to isolation movements and lots of accessories go
lightly and modestly at first. (The specifics of this progression are laid out in the MRS section.)

Where dreams are made!
Additional Guidance
Additional Guidance
What should you do if you miss estimated Rep Max (RM)
ability? Don’t sweat it too hard, successful training requires flexibility and
when you miss a rep target most of the time it won’t be by too much and as such
its impact can be mitigated if later in the session that effort is accounted
and adjusted for.
Perhaps the day calls for you to find a 5RM but what actually happened you were a bit overzealous and only got four reps, what should be done? Is progress ruined and the program now obsolete? No of course not. What occurred here was a slight intensity overshot that requires adjustment later in the workout to limit effort somewhere else, since it was over extended here. Because of this the T1 drop sets or T2a should be reduced by either weight or volume, depending on whichever you feel would benefit you most in that workout.
Perhaps the day calls for you to find a 5RM but what actually happened you were a bit overzealous and only got four reps, what should be done? Is progress ruined and the program now obsolete? No of course not. What occurred here was a slight intensity overshot that requires adjustment later in the workout to limit effort somewhere else, since it was over extended here. Because of this the T1 drop sets or T2a should be reduced by either weight or volume, depending on whichever you feel would benefit you most in that workout.
Accidentally too heavy on a Rep Max:
To reduce T1 drop sets by 2.5% to 5% or one set less. Or they can opt to
reduce the T2 work. Whichever the lifter feels would result in the highest
quality repetitions. But if the lifter is having a great training session the
entirety of the T1 and T2 can be attempted as programmed but they must take
efforts to ensure post workout recovery is enhanced whether by food, rest, or
both.
When finding rep maxes in the T3 and estimations
are too optimistic then it would be best to lower the weight enough to match
the RM goal on the next set and then continue with the called for Max Rep Sets
(MRS) with that lowered weight. So if you were supposed to hit a 12RM for curls
and do 3MRS but instead you only hit a 10RM at 85 pounds, your follow on T3 MRS
should be slightly lighter, like 75 or 80 pounds.
Accidentally too light on a Rep Max:
In this case you would determine how much weight
to add based upon how many more reps you felt were possible that first RM
attempt weight.
Example: Lifter-A finds their 6RM. They work up to 435/197,3 (lb/kg)
and stop when they reach six reps. After the set is over they determine they
could have done three more reps with that weight and they’re stoked that they’ve
gotten stronger.
Lifter-A then uses the below chart
to add the appropriate amount of weight for one additional attempt.
| Potential Extra Reps | Add this much for final T1 RM attempt (Lb/Kg) |
| 1-3 | Stop. Work harder in T2&T3. |
| 4 or more | Add 10/5 *Still gonna be a harrrrd set... |
Author’s Note: This table can be helpful across all tiers and merely serves as an initial means of guidance for lifters who are new to understanding their capabilities with RM attempts and matching that up to sustainable effort with Jacked & Tan 2.0. This skill becomes more intuitive and as a result this table will likely not match up with experienced lifters and those who continue through the program.
Take home here is that if you can only manage one to two
more reps with that weight then you’ve reached the actual goal: To approach failure closely enough
that similar efforts can be sustained across 12 Weeks.
In such a case it would be best to simply work harder later
in the workout, whether that be a T1 drop sets, follow on T2 movements, or the
T3. This can be done simply and effectively by adding a small amount of weight
to what’s programmed or adding a rep out to the final set of a movement. Ultimately
the means of increasing effort is up to the lifter.
Successful training requires an inherent amount of flexibility.
Training flexibility requires intelligent decision making
and there is no way around that. It is best to start learning personal
performance indicators early because they are more valuable as strength and
skill improve. Pushing for rep maxes is a great means of identifying technical
faults, work capacity issues, and many other training concerns. This is why
programs like Texas Method and other popular intermediate programs call for
such practices. But they fall short when it comes to utilizing rep maxes in
accessory movements- that’s where J&T2.0 fills the training gap and allows
the lifter to determine their capabilities and limitations for main movements and accessories across broad rep maxes. (From
concepts laid out in Applications & Adaptations.)

Didn't mean that kind of flexibility but if
you get down like that cool.
you get down like that cool.
Adding a 5th Day
Use a similar workout structure as first four days but with
a new T1 that should be selected based on what you want or need. (Meaning focus
it on squat by adding an additional type-of-squat day, or vice versa for bench
press, OHP, or deadlift.) Your 5th day T2 and T3 movements should
also be different in some way, but it is not required. An example of using the
same lift but making its use different enough would be having Incline Bench be
a T2a movement on Day 2 but later on an optional 5th day you make it
a T3a movement; thus using MRS versus linear percentage based progression.
Exposure to lift variety is a major component of this
program. When being strong in a variety of lifts you are generally strong,
which makes this program great for training general
strength. (Plus it’s fun to put up plates on a bunch of stuff!)
An alternative to adding a 5th day to Jacked
& Tan 2.0 is to instead make it focused on accessories in order to build
out a more complete package. Some lifts or body parts might need more attention
and a 5th “accessories” day is a great means to put that kind of
work in without going too heavy, too often, which may result in reduced
performance due to excess fatigue.
Example 5th day of Accessories option:
T2a – Barbell Row
T2b – T Bar Row
T2c – Dragon Flag
T3a – Ab Plank
T3b – Ez Bar Curl
T3c – Cable Rope Curl
Notice a lack of a T1. This means reduced intensity on this
day but that will allow you to put more effort into your back work because
unlike days one and three, this isn’t done after squatting or deadlifting.
If I could add a 5th day to my training schedule I
would do either of these things:
1.
Opt to make it a back, abs, and biceps focused
accessories day as those are generally what I feel this program lacks most (at
least in its off-the-shelf release version.)
2.
Focus it on Sling Shot work for the T1 with an
overhead option for the T2a because I personally want to bring up my squat and
bench most, in that order.
Fortunately, I’ve devised a plan that I feel provides a
reasonable inclusion of Sling Shot work as a T1. Because I really enjoy using
it and didn’t have time in my weekly schedule for another day, I’ve opted to replace
my T2a movement on the Day 4 Overhead Press workout with T1 Sling Shot work.
The remainder of the workout has normal T2 and T3 MRS progression. So far this
has been working well. Admittedly I’ll likely not be hitting any Slanger PR’s
because it follows other T1 overhead work but that’s less of my concern than
training my historically weak lockout with modestly overloaded intensities.
Conclusion
Clocking in at about 6,000 words this is nearly twice as
long of a write up compared to the original. Fitting I guess. Hopefully the added
length improves your understanding of its structure and progression because that
was the largest complaint regarding 15
Weeks of Jacked & Tan: The Results. (The confusion is admittedly my fault.) When I had released that program
never had I considered that so many people would use and benefit from it. I am
amazed that even today lifters contact me singing the praises of the original Jacked
& Tan.
So far my experiences on Jacked & Tan 2.0 are limited to
the first three weeks, which have been brutal, but the most fun I’ve had in the
gym in many months. The clients helping me develop this are seeing excellent
progress, especially in size and work capacity.
Luckily there’s a strong correlation between those two and strength
improvement. Feedback from them is good and a summary of their accounts can be
stated as “PR’d again in the T1, T2 might
be a volume PR (not sure never really tracked it), and T3 continues to be a
murderer, but it’s fun.”
At the very least Jacked & Tan 2.0 is going to be a
break from the usual monotony associated with common strength programs. It has
always been my priority that training remain fun and challenging. If this
program is anything it is definitely those two. It is not specialized for
powerlifting or bodybuilding but instead represents my approach to a hybridized
goal that will yield positive results for both strength and size should you
have the required effort.
Lastly, remember nothing special is needed in getting bigger
and stronger. No special programs, methods, movements, or spells to cast. There
are a variety of means to getting jacked. From some Bulgarian madness to Dorian
Yate’s “Blood and Guts,” lifters around the world have seen strength and size
increases by countless means.
You’re on your own when it comes to the tan. I've got no idea about that but I can make a mean burrito.